Wednesday, November 27, 2013

Side Openings on Bibs and Aprons

 
Have had requests for side openings on Bibs and Aprons. The results are shown on one of my Crumb Catching Adult Bibs up above.

Note: Clicking on the photos will enlarge the photos.

Wasn't hard at all to do at all...


Just made a simple change on my 6 inch circular cut-out. Just squared off just one of the corners. That simple!

For the bibs and aprons:

Started off with two strips of fabric 14 inches wide by about 30 inches long for the bib. When starting out, I pinned the two pieces of fabric together with the right sides inwards and the wrong sides outwards.  I turned up 2 1/2 inches to form the crumb catching pocket on this bib, which I allowed for in the length of 30 inches on  both of the fabric strips.

For the apron:  Change the length to 10 to 15 inches longer. You can turn from 5 to 8 inches to form the pockets on the apron.  Plus optional wrap around- tie in the back- straps, with each one being about 30 to 45 inches long.

On the wrong side of one of the 2 fabric strips that I pinned together I centered my altered cut-out, about 4 inched down from the top and about 4 inches in from the sides. Traced the cardboard cut out onto just one side of the fabric. The tracing line became my cutting line afterwards.

 Note: A cereal box came in handy for making up the altered circular cut-out.


Rounded off the top 2 corners on the pinned fabrics. Cut the altered circle out of both layers of fabric. Then cut an opening in the side, above ones heart.

Continued on as usual with sewing a 1/4 inch around the edges.  Started off near the center of the bottom of the bib. Followed the raw edges all the way around the outer part of the bib and the neck area. Went up one side, around the neck cut-out, across the top, and down the other side and cross the bottom, with leaving about a 3 inch opening for turning the bib...  Should look like the above photo, but, on the wrong side of the fabric and without the Velcro on it.

Note: If you need a larger opening for the neck area increase your 1/4 inch row of sewing to either 1/2 inch or 3/4 inch. If doing that, when done you must trim the top of the bib seam to 1/4 inch in the neck area. That is a very important step, otherwise you will have problems after turning the fabric to the right side and top stitching same.


Turn the bib completely inside out through that 3 inch opening. Iron off the bib. Top stitch the bib... Or pin the outer parts of the edges as I did, which you can tell from the white side because I didn't iron it off before top stitching, with hand pressing the edges as I pinned... Just didn't want to break my iron out and did it the old fashioned way... It should look like the above on both sides of the bib after those steps. You are looking at the back of the bib in the above photo.


Turn up about 2 1/2 to 3 inches to form the crumb catching pocket from the back side of the fabric to the front side. That's why you use contrasting fabric for the back of the bib... Top stitch one side down and continue across the bottom and up the other side. Be sure to back stitch in the beginning and the ending of your stitching. It should look like the above photo after the pocket is formed. This step is optional.

For the apron: On the apron you can form 2 pockets by running a row of stitches upwards from the bottom in the center of the apron long pocket to the top of the pocket. Be sure to back stitch at both ends when doing this step.


For the side closure we choose the Velcro. You can actually also use either snaps or buttons and button holes if you prefer to do so. I used two inch long strips of Velcro... It's your option. When completed, should look like the above photo on both sides.


The front neck area opened.
 
 
The front neck area closed.
 
 
The back neck area opened
 
 
The back neck area closed
 
 
The front of the bib
 
 
The back of the bib.
 
The apron: The apron is pretty much the same, except for the length of it and, optionally,  ties added  to it around the waist area to tie in the back or to wrap around and tie in the front of the apron... Style and location of pockets are optional and may vary.  Individual 6 to 8 inch square pockets can be added instead of using the row of pockets as shown on the bib... All your choice, of course.

You can see 3 more of my Adult Bibs/Crumb Catchers  that have the opening in the back of them  by clicking here 
 

Wednesday, November 20, 2013

Charlie G's Apron

Here's a photo of Charlie G wearing one of the two aprons I made for him recently. Besides his loving to cook, he had me make one for him to wear while he worked in his home/hobby wood shop where he makes lawn ornaments and, most recently doll beds and doll cribs.

The fabric is denim for the body of the aprons with the ties made out of a blue and green John Deere cotton plaid. It's hard to see all of the pockets. There is one at the top section of the apron along with a row of them going across the width of the bottom of the apron, all from the denim fabric too. 

The two aprons are pretty much identical. Except that one of the aprons has a zipper on it, going across a section of one of the bottom pockets for when he goes to the flea markets with the wooden items he hand makes.

Wednesday, September 25, 2013

Doll Beds & Doll Cradles

American made.
 
Hand crafted in the USA by Charlie and Peggy
 
Click on the photos to enlarge them.
 
As Santa's helpers, here are some photos of the Doll Beds and Doll Cradles that Charlie and I have been working on which includes covered mattresses...  They are recommended for ages 5 and up.

The front and back on the cribs are the same.  The doll beds headboard is taller than the bottom part. The insides of the beds are painted white with the outside having a wooden grain look. 

The mattresses are polyester with the mattress covers being a white cotton-polyester fabric.

More views with dolls in the beds and cradles.
 
The beds will comfortably fit dolls up to about 20 inches long, whereas the cradles are for baby dolls up to about 17 inches long.   

There are no nuts, bolts, screws or the like in them. The beds and cribs each consist of 7 inter-locking pieces which are easily assembled. Adult guidance suggested for same.
 
7 Simple Assembly Steps
 
With the 7 interlocking pieces they can easily be taken apart and unassembled and reassembled when going to visit Grandma for a few days or the like, especially if taking the dolls along too. These assembly instructions are for both the beds and cribs.
 
Just put the mattresses into the beds and/or cribs after they are assembled.  Dolls are then ready for nap time and/or bedtime.
 
Bedding, such as pillows, pillow cases, sheets, top sheets, blankets,  decorative pillows and comforters can also be added. Peggy also makes some of them up. Photos taken by Peggy at a local Flea Market that she and Charlie attended with their doll beds and doll cribs.

Monday, February 4, 2013

Outfit # 2 for Theresa, an 18" doll


Same outfit, but, with different colored shoes. Can tone it up or down with same.

Monday, January 21, 2013

Monday, December 31, 2012

New Dolly Club Member & Author

Came across one of the Karen's and the Dolly Club on blogspot.com recently and joined the group there. With my first granddaughter being 2 1/2 years old, I "got the fevor" of making doll clothes again. Just have to get started doing same. Seems like I haven't made any in ages, with having sons and no daughters. Picked up a pattern for making clothes for an 18 inch doll yesterday afternoon when going to Walmart's to buy myself a new pair of shoes. Some of my shoes are scratched up from Velvet, my black cat's claws. Hate to say it, but Velvet passed on earlier this month and most likely at Rainbow Ridge awaiting their masters to pick them up while enroute to heaven. She was about 14 1/2 years old. She was born on April 1, 1998, and a Bombay, which is like a minature black panther with yellow eyes. A "pantherine" you might say Velvet was. Both Sparky, my other cat, who is a Calico, who is three months younger than Velvet, and I will miss Velvet a whole bunch. Back to dolls... Bought my granddaughter an 18 inch doll for Christmas this year. It has long brown hair and brown eyes. Also bought myself one, with blonde hair and blue eyes to use as a manikin... Yea, right! Think I'll call my doll "Theresa" which is the name I had picked out if I ever had a daughter. It was my grandmothers middle name and the name I took for confirmation. Her first name was Winifred, where my middle name came from. Thus she, was Winifred Theresa, which actually is part of my name. I'm more or less known as Peggy Winifred Theresa, which is of Irish ancestory, same as my mother and my grandmother... When I make up some doll clothes, etc for Dolly and Theresa, I'll post some here and on the Dolly Club blogspot. I signed up to become an author over there. Speaking of "author" went to lunch with a friend whose black cat's name is "Author Author" earlier today. He has both a first and last name, both being Author...LOL. She is an author herself, with several books published. If you look over on the side where my links are, you'll find her listed there, Louise Barton, http://louisebartonsbooks.blogspot.com/ Tonight is New Years Eve. I decided to stay in. Had a couple of invites to go out, but, not really in the mood for celebrating. Still missing Velvet a lot. Sparky is still prancing around the house looking for Velvet, calling her all of the time with her Siamese sounding meows. Maybe I'll start making my first outfit for the dolls instead of running the roads with some of my senior peers tonight.
Sunday, October 14, 2012

More of my sewing projects

Have completed several other sewing projects this past year, 2012, which include the following:
1) A Maxi Dress for myself:
2) Reversible Apron Vest for a friend:
3) A fishy Purse for my toddler granddaughter:
4) A swing skirt, using a vintage 1950's pattern Also in this collage of photos is another one I made in 2009:
5) A 2 piece sun/bathing suit. Made a minor change by adding some trim to the edges of it as shown in the photo collage after making the outfit.
6) Some Pillows:

Thursday, January 19, 2012

Sew-A-Long photos for Simplicity's Suede Says Fashion's Night Out Red Bag

Update on pattern designer, Suede: On October 25, 2012 Suede will be one of the designers in the Project Runway All Stars, Series 2 on the Lifetime channel, Thursday nights, at 9PM, EST. Suede now has purple hair... Suede was in Project Runways Series 5 a few years earlier.
My Finished Bag:

Photos of the front & back of it...


1. Click on the photos to enlarge them. Use your back browser arrow at top to return.

Simplicity # 0109

Suede, from Project Runway is involved with a Sew-A-Long on Facebook which I plan to participate in. The sew-a-long will start on January 24, 2012 and finish up around February 14, 2012. For more info, go to:

http://www.suedesays.com/blog/suedesays%E2%84%A2-sewalong-starts-124

And check back here to see photos of my bag  from the Sew-A-Long, too.

Working from my fabric stash. Only have to buy the pattern and  the zippers. The pattern calls for two 28 inch long zippers.

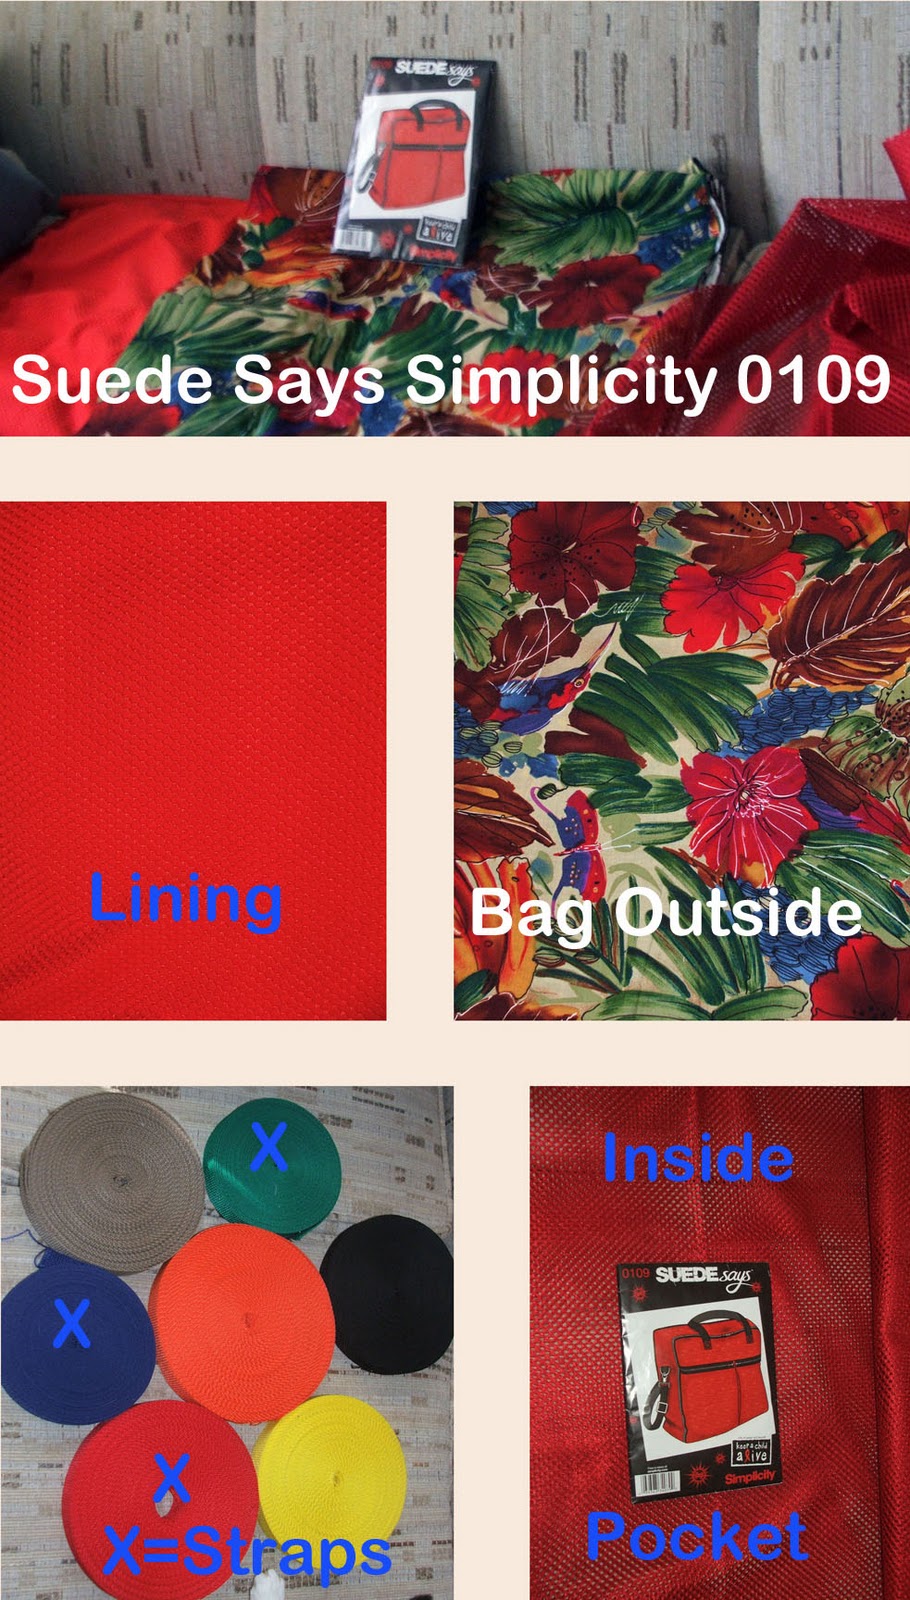
2. Bag pattern arrived 1/24/2012 . The fabric for the outside of the bag was an eBay purchase. The red fabrics came from Walmarts several years back. Working my stash on the fabrics.  The bag has 3 straps. Each one is going to be a different color on this bag.
 3. Closeup of the outside printed fabric

4.  Guess who had to get into the act?

 5. Closeup of the fabric lining.
Note: Didn't use this one on the bag. Used a red fabric with white dots in place of it. This fabric might ended up on a red dress instead...

 6. Closeup of the fabric for the inner pocket.

7. The 1" PolyPro webbing.
Will be using the red, green and blue for the 3 handles.
 Red for the long strap. Green & blue for the short center handles.
Yes, that's the tip of the cat's paw over on the edge of the photo.


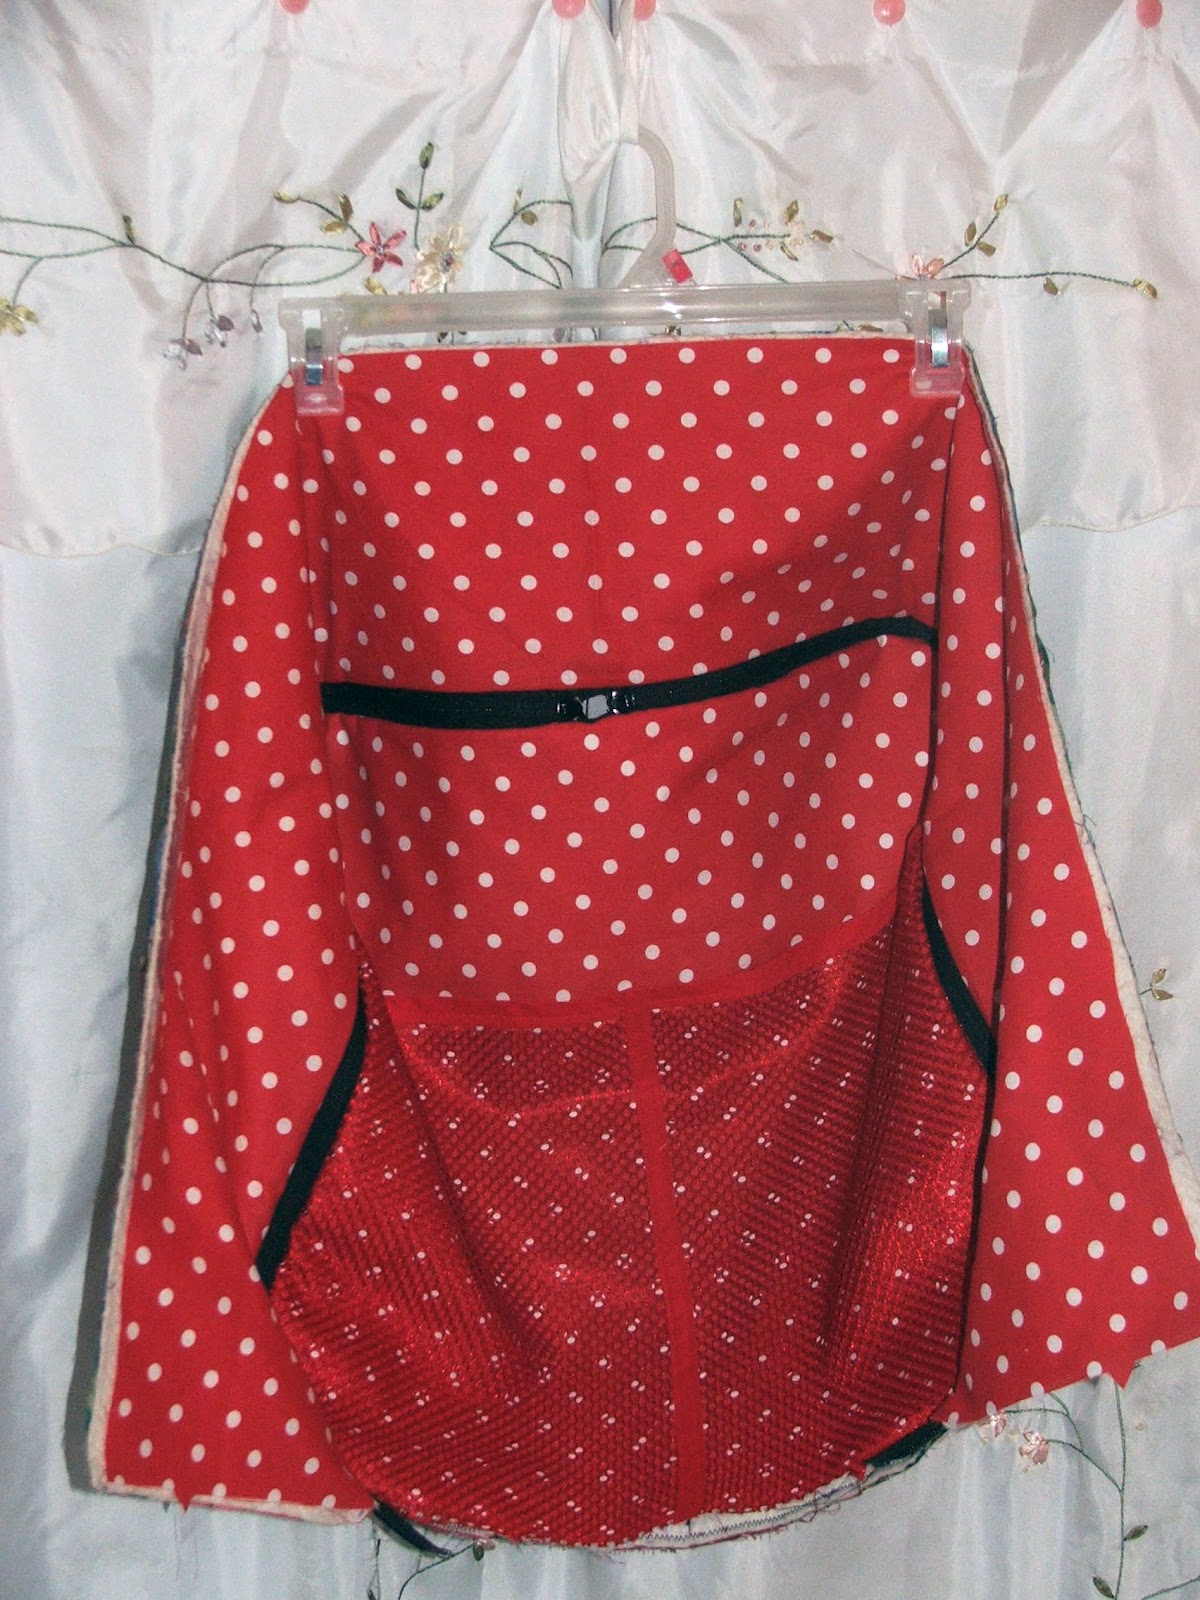
8. 1/24/2012: Made a change with the lining fabric for the insides. Didn't like he red on red, so changed the lining to white polka dots on red. The solid red is the pocket.


9. Closeup of the white polka dots on the red fabric. This fabric was an eBay purchase last year. Was going to use it for my GD's 1st B'day dress, but, my DIL changed her mind and switched over to the pink background, so, into my fabric stash went this fabric...


10. 1/25/2012: Cut out the outside pattern parts.


11. Next, cut out the inside lining plus the inside pocket.


12. All cut out and ready for the next step

13. 1/26/2012 Update: Cut out the batting and sewed it to just 4 of the outside pieces, the top, the bottom and the 2 pieces for the sides/gusset. 


14. Used the off-white Warm & Natural batting on this bag, S0109. Made large diamonds because you can quilt up to 10" apart with same. Like the way that the batting stuck to the fabric. Reminded me of the way Velcro would stick to certain fabrics too. Didn't really have to pin the fabric and batting together, but, did so to be on the safe side. My zippers arrived today, Thursday, 1/26/2012. Didn't get to the pockets. That's on the agenda for tomorrow. Watched the video for doing up the front pocket. Looks easy. Pleats are a cinch for me. Zippers, that's a different story...
15. I actually drew my diamond shapes on the batting, using a pen and a ruler. Used 6 1/2 inches spacing on the top and the bottom, with 6 inch spacing on the width of the sides/gussets, which made them oblong diamonds on the gussets. Didn't attach the lining to the batting back. I'm following the pattern instructions but doing it slightly different because the pattern called for prequilted fabric, with the fabric quilted on both sides. I'm one of those who doesn't always follow the pattern to the "T."  Learned to do some things slightly different back when I had sewing in high school, over 50 years ago. Just used one package so far. Had to piece the gusset strip to make it long enough for the top and sides pattern piece.


*****************************************

Simplicity sew-a-long videos for this #0109 bag can be found at: http://www.youtube.com/user/SimplicityVideo

************************************************
16. 1/30/2012 Update - Completed the pockets. Actually gave the bag 6 pockets. that's 3 on the outside and 3 on the inside. Closeups below.

17.  Inside large pocket made from the sports mesh.

18. Inside double pocket made same as the above pocket plus adding s strip of binding down the center of it, to form a second pocket. 

19.  Outside large single pocket with a Velcro enclosure.

20. Outside double pockets, pleated with each pocket enclosed with a 9 inch zipper going across the top of the pocket.


21. 2/24/2012 Update: Started sewing the large 28/30 inch zippers in and assembling the bag. Using a # 18 sewing machine needle to do so.  Finished up early Sunday morning, 2/25/2012. Worked through the night...LOL. Today is Super Bowl Sunday, so, I might not get much more done today. Going to take a nap for a few hours before tackling the thick bottom gusset. Closeup photos below.


22.  The bag inside above.

23. The bag outside above.

24. Closeup showing the quilting: Just the outside front & back sections and the gussets are quilted onto the Warm & Natural. The outside pockets fabric is doubled because I folded the fabric in half before cutting the pockets out. I used black thread which blends into the design for doing the quilting. My diamonds are spaced about 6 inches apart. With the W & N your row spacing can be as far as ten inches apart.  I backed the inside red polka doted center parts with 2 layers of plain white cotton fabric without quilting it. However, didn't do that on the gusset pieces. The edges of the different quilted and backed parts are zig zagged in black. The inside pockets are a single layer of mesh with red binding going across the top on them, with one having the binding going down the center to form 2 pockets. See the above closeup photo showing  the quilting with the black thread on the outside parts.

25. Hardware for the strapping.  Also used more of the slides in the bottom row when attaching the strapping/webbing to the grosgrain ribbon strips.


 26. Added an inside bottom pocket for the plastic canvas. Instructions below for doing same. Did this before adding straps/webbing.

 27. The instructions for adding the bottom pocket for the plastic canvas.

 28. What the plastic canvas would look like in the bottom pocket without the mini pillowcase/sleeve.

29. preparing the grosgrain ribbons and the straps/webbing for the top center handles and the side webbing. As you can see, changed my mind about using the different colors of  PolyPro webbing/straps on the bag. Settled with doing all of them in ine color, black. More or less made this change and other changes as the bag was being made up.

 30. Sewing the grosgrain ribbon (with attached webbing/straps) to the bag on one side. Lined the slide up to the zipper for placement.
 31. Doing same to the other side, using the seam for alignment.

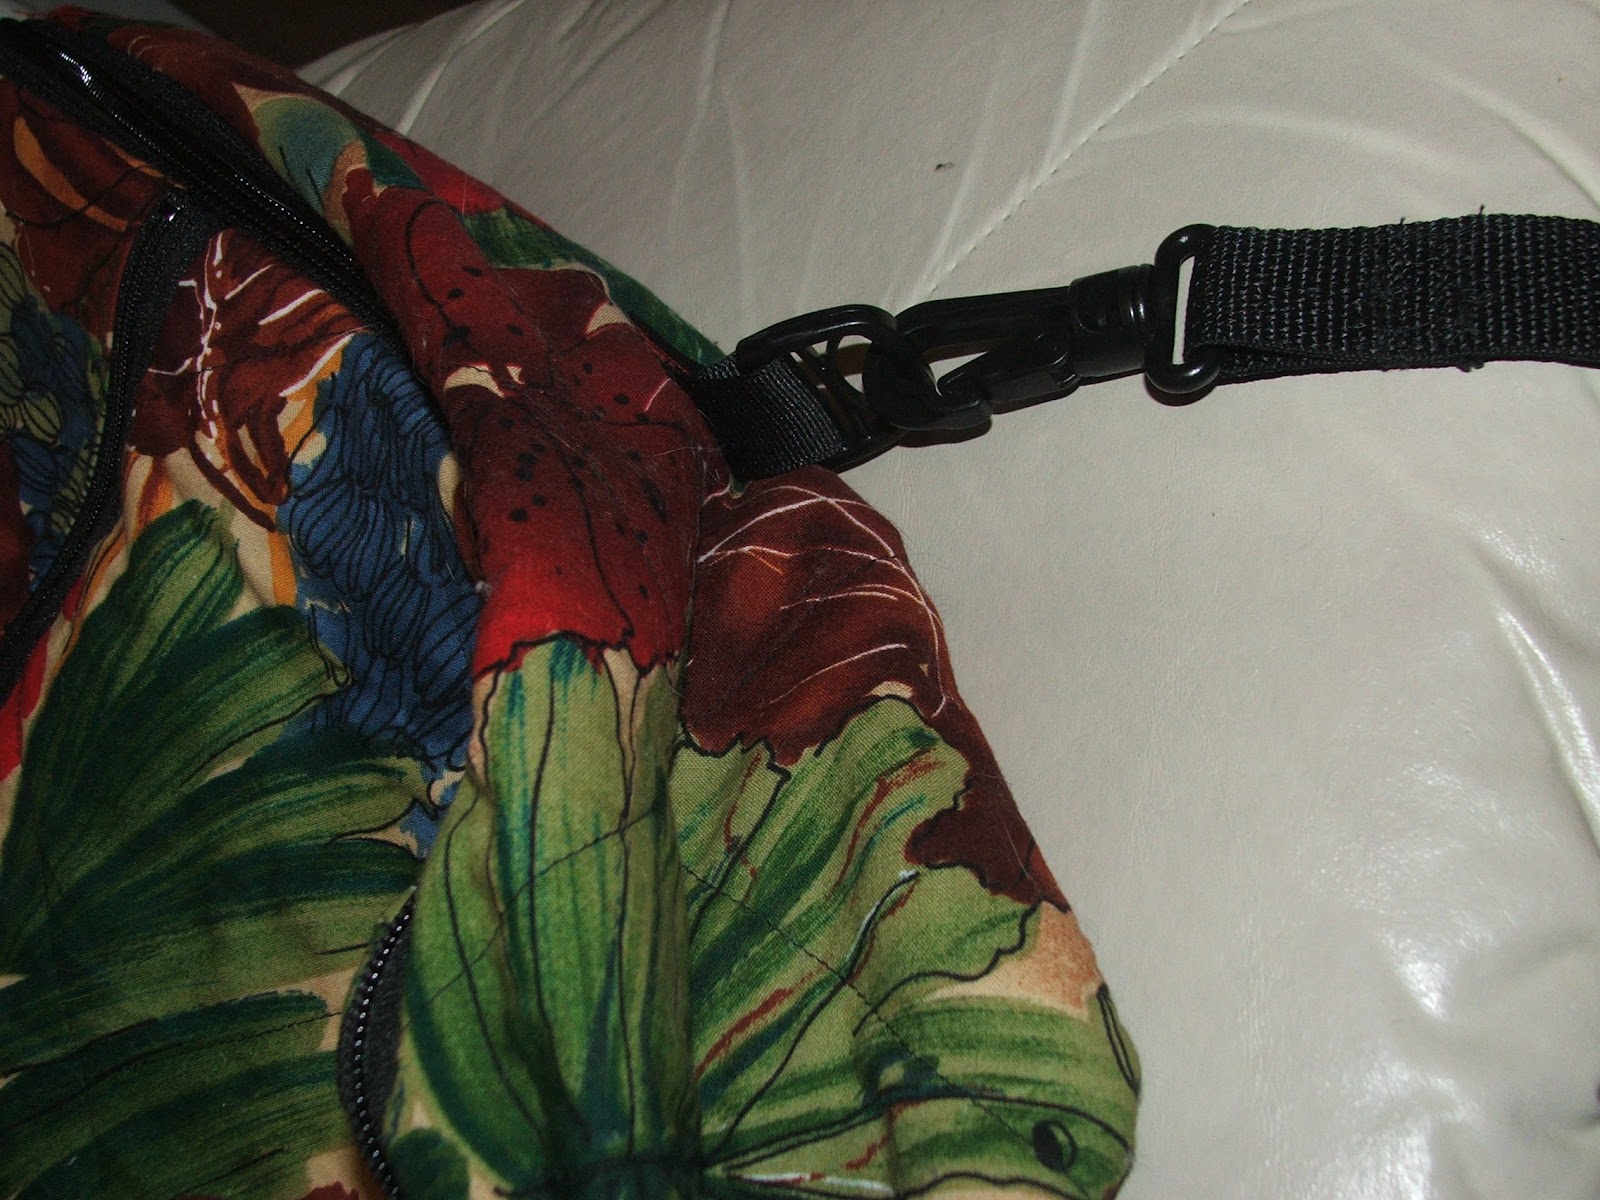
32. Attached the " D" ring to the side gusset. The strap and swivel hook attached to same afterwards.

33. Side with the pleated pocket. Added silver key rings to the zippers and red key chain holders to the key rings to help keep the zippers from opening.

 34. The completed other side of the bag with the large single pocket which is held closed via Velcro. Added a diamond shaped embroidered strip to the pocket edge to define the top of the pocket.

35. Showing both sides of the bag and the inside fabric all in one photo.

*********************

 
CONCLUSION: Was fun in making up this bag. Thanks Suede for the Facebook sew-a-long and Thanks to Simplicity for the video instructions. Thanks to all of the others involved with same too. Also enjoyed conversing with others on Facebook involved with making up their own bags from this pattern, too as we worked on our own bags.