My Finished Bag:

Photos of the front & back of it...

1. Click on the photos to enlarge them. Use your back browser arrow at top to return.
Simplicity # 0109
http://www.suedesays.com/blog/suedesays%E2%84%A2-sewalong-starts-124
And check back here to see photos of my bag from the Sew-A-Long, too.
Working from my fabric stash. Only have to buy the pattern and the zippers. The pattern calls for two 28 inch long zippers.
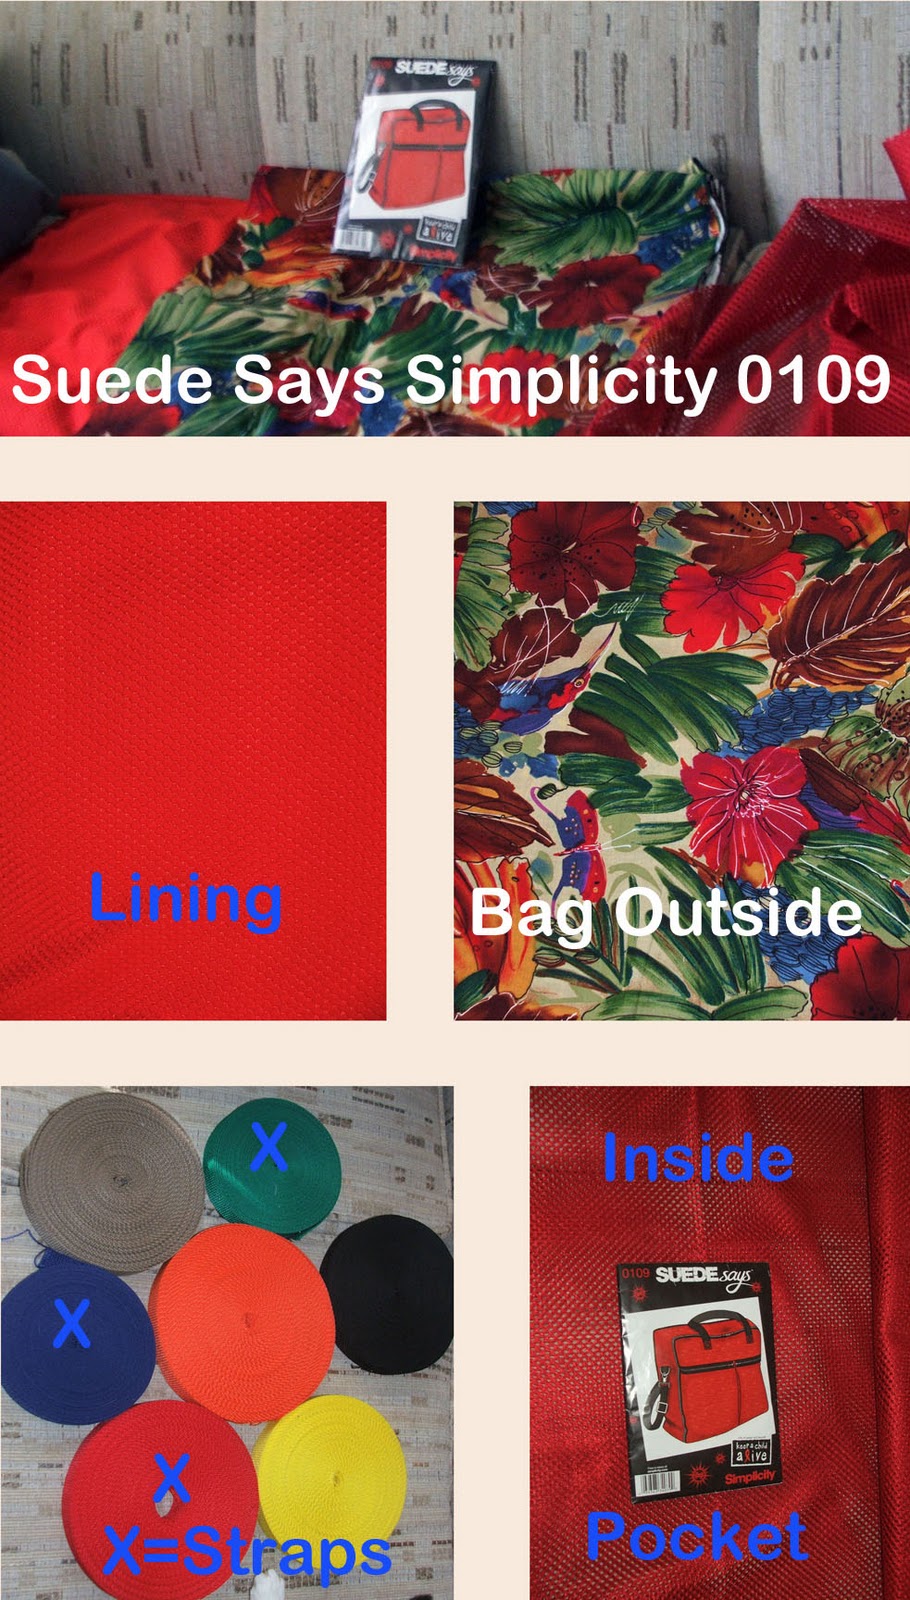
2. Bag pattern arrived 1/24/2012 . The fabric for the outside of the bag was an eBay purchase. The red fabrics came from Walmarts several years back. Working my stash on the fabrics. The bag has 3 straps. Each one is going to be a different color on this bag.

3. Closeup of the outside printed fabric

4. Guess who had to get into the act?

5. Closeup of the fabric lining.
Note: Didn't use this one on the bag. Used a red fabric with white dots in place of it. This fabric might ended up on a red dress instead...
Note: Didn't use this one on the bag. Used a red fabric with white dots in place of it. This fabric might ended up on a red dress instead...

6. Closeup of the fabric for the inner pocket.

7. The 1" PolyPro webbing.
Will be using the red, green and blue for the 3 handles.
Red for the long strap. Green & blue for the short center handles.
Will be using the red, green and blue for the 3 handles.
Red for the long strap. Green & blue for the short center handles.
Yes, that's the tip of the cat's paw over on the edge of the photo.
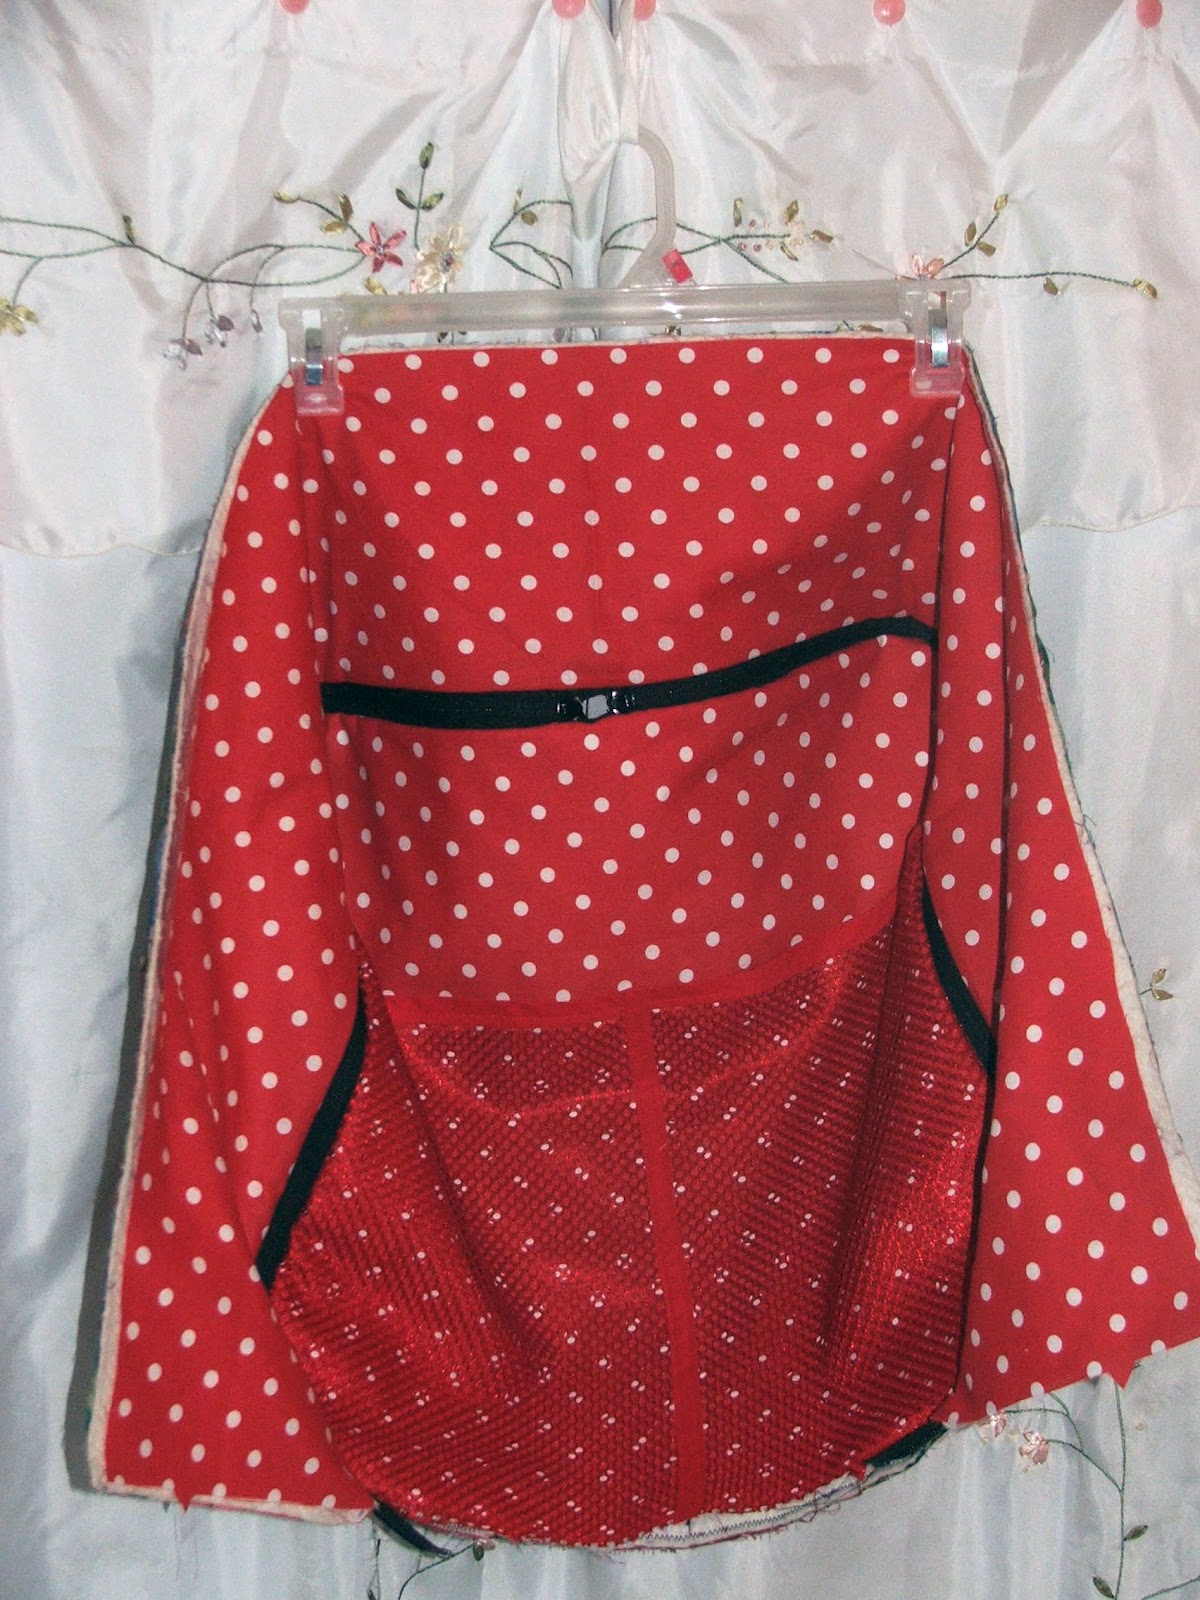
 8. 1/24/2012: Made a change with the lining fabric for the insides. Didn't like he red on red, so changed the lining to white polka dots on red. The solid red is the pocket.

 10. 1/25/2012: Cut out the outside pattern parts.
 11. Next, cut out the inside lining plus the inside pocket.
 12. All cut out and ready for the next step
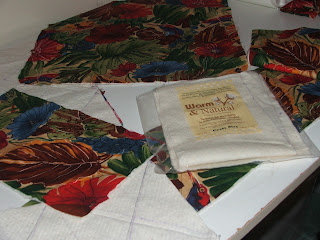
 13. 1/26/2012 Update: Cut out the batting and sewed it to just 4 of the outside pieces, the top, the bottom and the 2 pieces for the sides/gusset.

14. Used the off-white Warm & Natural batting on this bag, S0109. Made large diamonds because you can quilt up to 10" apart with same. Like the way that the batting stuck to the fabric. Reminded me of the way Velcro would stick to certain fabrics too. Didn't really have to pin the fabric and batting together, but, did so to be on the safe side. My zippers arrived today, Thursday, 1/26/2012. Didn't get to the pockets. That's on the agenda for tomorrow. Watched the video for doing up the front pocket. Looks easy. Pleats are a cinch for me. Zippers, that's a different story...
 15. I actually drew my diamond shapes on the batting, using a pen and a ruler. Used 6 1/2 inches spacing on the top and the bottom, with 6 inch spacing on the width of the sides/gussets, which made them oblong diamonds on the gussets. Didn't attach the lining to the batting back. I'm following the pattern instructions but doing it slightly different because the pattern called for prequilted fabric, with the fabric quilted on both sides. I'm one of those who doesn't always follow the pattern to the "T." Learned to do some things slightly different back when I had sewing in high school, over 50 years ago. Just used one package so far. Had to piece the gusset strip to make it long enough for the top and sides pattern piece.
*****************************************
Simplicity sew-a-long videos for this #0109 bag can be found at: http://www.youtube.com/user/SimplicityVideo
************************************************

 17. Inside large pocket made from the sports mesh.
 18. Inside double pocket made same as the above pocket plus adding s strip of binding down the center of it, to form a second pocket.
 19. Outside large single pocket with a Velcro enclosure.


 22. The bag inside above.
 23. The bag outside above.
 24. Closeup showing the quilting: Just the outside front & back sections and the gussets are quilted onto the Warm & Natural. The outside pockets fabric is doubled because I folded the fabric in half before cutting the pockets out. I used black thread which blends into the design for doing the quilting. My diamonds are spaced about 6 inches apart. With the W & N your row spacing can be as far as ten inches apart. I backed the inside red polka doted center parts with 2 layers of plain white cotton fabric without quilting it. However, didn't do that on the gusset pieces. The edges of the different quilted and backed parts are zig zagged in black. The inside pockets are a single layer of mesh with red binding going across the top on them, with one having the binding going down the center to form 2 pockets. See the above closeup photo showing the quilting with the black thread on the outside parts.
 25. Hardware for the strapping. Also used more of the slides in the bottom row when attaching the strapping/webbing to the grosgrain ribbon strips.
 26. Added an inside bottom pocket for the plastic canvas. Instructions below for doing same. Did this before adding straps/webbing.
 27. The instructions for adding the bottom pocket for the plastic canvas.
 28. What the plastic canvas would look like in the bottom pocket without the mini pillowcase/sleeve.
 29. preparing the grosgrain ribbons and the straps/webbing for the top center handles and the side webbing. As you can see, changed my mind about using the different colors of PolyPro webbing/straps on the bag. Settled with doing all of them in ine color, black. More or less made this change and other changes as the bag was being made up.
 30. Sewing the grosgrain ribbon (with attached webbing/straps) to the bag on one side. Lined the slide up to the zipper for placement.
 31. Doing same to the other side, using the seam for alignment.

 33. Side with the pleated pocket. Added silver key rings to the zippers and red key chain holders to the key rings to help keep the zippers from opening.
 34. The completed other side of the bag with the large single pocket which is held closed via Velcro. Added a diamond shaped embroidered strip to the pocket edge to define the top of the pocket.
 35. Showing both sides of the bag and the inside fabric all in one photo.
*********************
CONCLUSION: Was fun in making up this bag. Thanks Suede for the Facebook sew-a-long and Thanks to Simplicity for the video instructions. Thanks to all of the others involved with same too. Also enjoyed conversing with others on Facebook involved with making up their own bags from this pattern, too as we worked on our own bags.


9. Closeup of the white polka dots on the red fabric. This fabric was an eBay purchase last year. Was going to use it for my GD's 1st B'day dress, but, my DIL changed her mind and switched over to the pink background, so, into my fabric stash went this fabric...


14. Used the off-white Warm & Natural batting on this bag, S0109. Made large diamonds because you can quilt up to 10" apart with same. Like the way that the batting stuck to the fabric. Reminded me of the way Velcro would stick to certain fabrics too. Didn't really have to pin the fabric and batting together, but, did so to be on the safe side. My zippers arrived today, Thursday, 1/26/2012. Didn't get to the pockets. That's on the agenda for tomorrow. Watched the video for doing up the front pocket. Looks easy. Pleats are a cinch for me. Zippers, that's a different story...

*****************************************
Simplicity sew-a-long videos for this #0109 bag can be found at: http://www.youtube.com/user/SimplicityVideo
************************************************

16. 1/30/2012 Update - Completed the pockets. Actually gave the bag 6 pockets. that's 3 on the outside and 3 on the inside. Closeups below.


20. Outside double pockets, pleated with each pocket enclosed with a 9 inch zipper going across the top of the pocket.

21. 2/24/2012 Update: Started sewing the large 28/30 inch zippers in and assembling the bag. Using a # 18 sewing machine needle to do so. Finished up early Sunday morning, 2/25/2012. Worked through the night...LOL. Today is Super Bowl Sunday, so, I might not get much more done today. Going to take a nap for a few hours before tackling the thick bottom gusset. Closeup photos below.


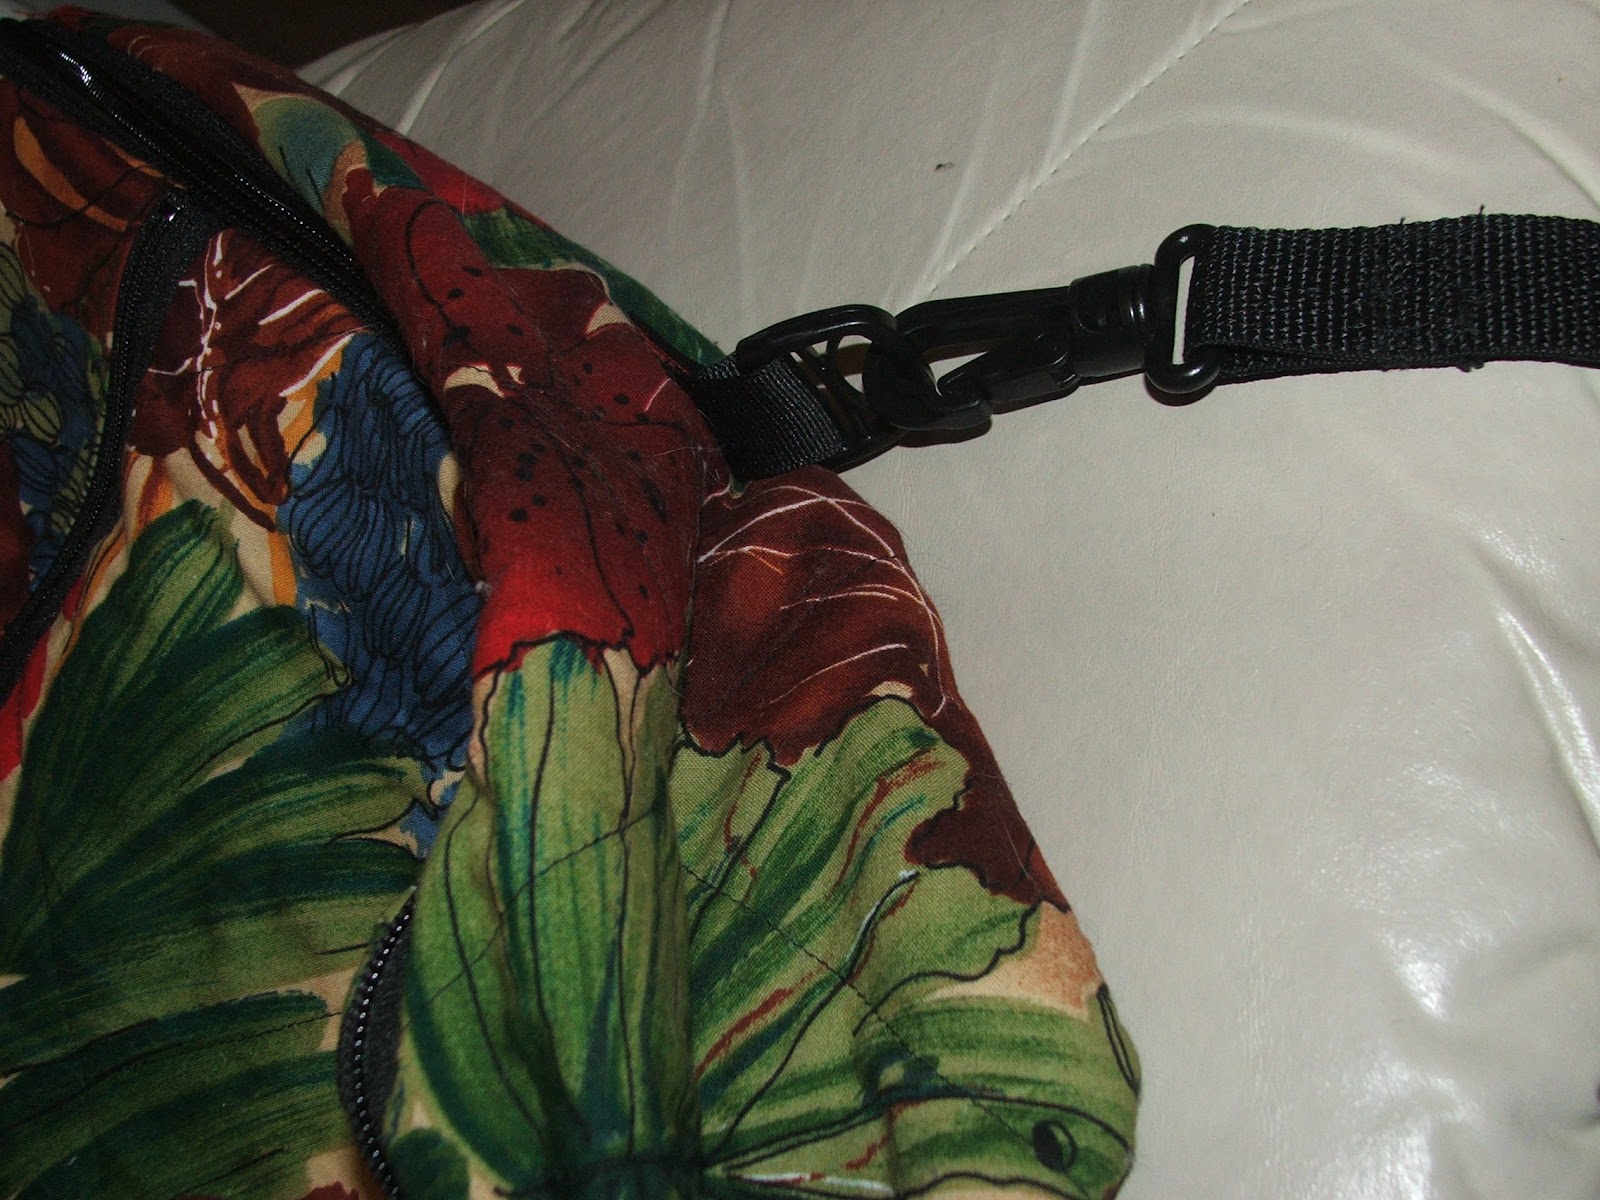
32. Attached the " D" ring to the side gusset. The strap and swivel hook attached to same afterwards.


*********************
CONCLUSION: Was fun in making up this bag. Thanks Suede for the Facebook sew-a-long and Thanks to Simplicity for the video instructions. Thanks to all of the others involved with same too. Also enjoyed conversing with others on Facebook involved with making up their own bags from this pattern, too as we worked on our own bags.