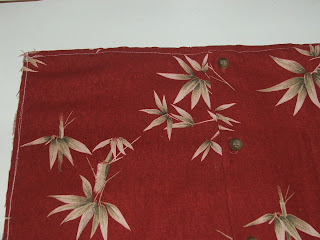
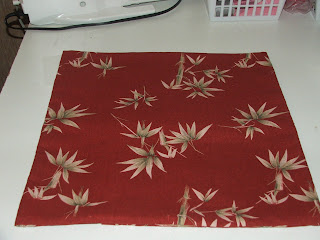
You should have completed Part 1, Making the 2 squares before coming to this section. If you haven't, click here to go back there.
We are going to make French Seams that will look like Flat Felled Seams on the inside of the pillow with a row of stitching showing on the outside, about a half of an inch from JUST the top and bottom seams, but NOT on the side seams. When completed, there will be no raw seams on any of the 4 sides of the pillow, inside nor the outside of the pillow.
1. With the right sides of the fabric facing outwards on both of the fabric squares, pin across the top and the bottom of the pillow.
2. Sew about 1/4 of a seam across the top of the pillow on the RIGHT side of the fabric. Do the same across the bottom of the fabric, too. You are not doing anything with the sides of the pillow at this point. We are just working with the top and the bottom parts of the pillow.
3. Turn the pillow inside out to the WRONG side to now work on. Make another seam across the top of the fabric pillow. Repeat this step across the bottom of the pillow.
4. Your pillow should look like this on both ends of the top and the bottom on the WRONG sides of the pillow. This is as far as we are going to go when we do the sides, but, we are going to go one step further on the top and the bottom of the pillow to give it extra strength for inserting the pillow and for taking the pillow cover off of the pillow, which will be done in number 5. At this point, the sides of the pillow should still have their raw ends untouched.
5. Make the pillow look like a tube, with working on the WRONG sides of the pillow. Fold the loose hanging 1/2 inch seam towards the side that the button and buttonholes are on. Sew across and close to the ends of the seam.
6. Your seam should look like this on the top and the bottom of the WRONG sides. Click on the photo to enlarge it if you wish to get a better view. You can do that anytime to any of the photos to enlarge them somewhat.
7. Turn the pillow over to the RIGHT side. It should look like this going across the top and the bottom of the pillow. We are not going to do this step when we do the sides of the pillow, which are and still be raw and untouched at this point.
8. NOW we are going to start working on the sides of the pillow. With the RIGHT sides pf the pillow up, saw a seam down the sides, about 1/4 of an inch as you had done to the top and the bottom of the pillow in number 2.
9. On the RIGHT side, open up the buttons. Turn the pillow inside out to the WRONG side through the opened button area.
10. Check your corners. Square them off by either poking them out with a stick from the inside or GENTLY use your seam riper to do this step.
11. After doing that step, make another row of stitches down both sides of the pillow as you did to the top and the bottom of the pillow in step number 3.
12. Both of the sides and the bottom should look like this on the WRONG sides. Click on the photo to enlarge it if you wish to see a better view of it.
13. Turn your pillow to the RIGHT side through the center button and button hole section. The RIGHT side should look like this. Enlarge the photo for a better view by clicking on it if you wish to do so. Almost done.
14. Now, it's CLEAN UP TIME. Check to see of you have any loose threads or the like showing on the RIGHT side of the pillow. If you have any showing as I have, as showing in the above photo, GENTLY CUT THEM OFF with a pair of scissors.
15. You should have cleaned up any hanging threads and should end up with CLEAN EDGES all the way around the pillow. The pillow should look like this on the button and the buttonhole side of it. You can see that I left the pocket on this pillow because I have the pocket buttoned up. You can see that near the top of the photo, a few inches down and inwards, near the tip of the corner, near the edge of the long pointed pedal of the flower/leaves. The buttons are a brownish/green color that match the color on the insides of the pointed flowers/leaves.
16. The other side without the button or buttonholes should look like this.
17. I inserted the memory card from the funeral home of Ed into the pocket on this card. You can more or less put anything you want into the pocket and, then button it up, if it should have a button and button hole on it. Maybe even a tooth can even be inserted into it, for the Tooth Fairy to find? Or a special message? A love note? A holiday greeting? That is, if you left the pocket on the pillow, to make it a Pocket Pillow.
18. This is what the button and buttonhole side would look like when the pocket is buttoned up or there is no pocket on it at all.
19. This is what the other side looks like that doesn't have the buttons or the buttonholes on it. I didn't put any name tags on it or the like because I didn't want to take away for what this one was intended for, to be used as a
"Memory Pillow" for my neighbor. This pillow was made up from one of her late/deceased husband's Hawaiian shirts that she gave me to make this pillow up from, as shown in the top storyboard photo. Ed & Marie were married for 54 years before Ed passed away in December, 2009. That is why I made up this pillow for Marie and why it is so special for her, to cuddle up to when she goes to sleep, and for being on their Love Seat in their livingroom during the daytime. The idea for this pillow came from The Patchwork Cushion Cheat Pillow which a friend posted in a Yahoo craft newsletter.


