
*************************************************
Making the quilt

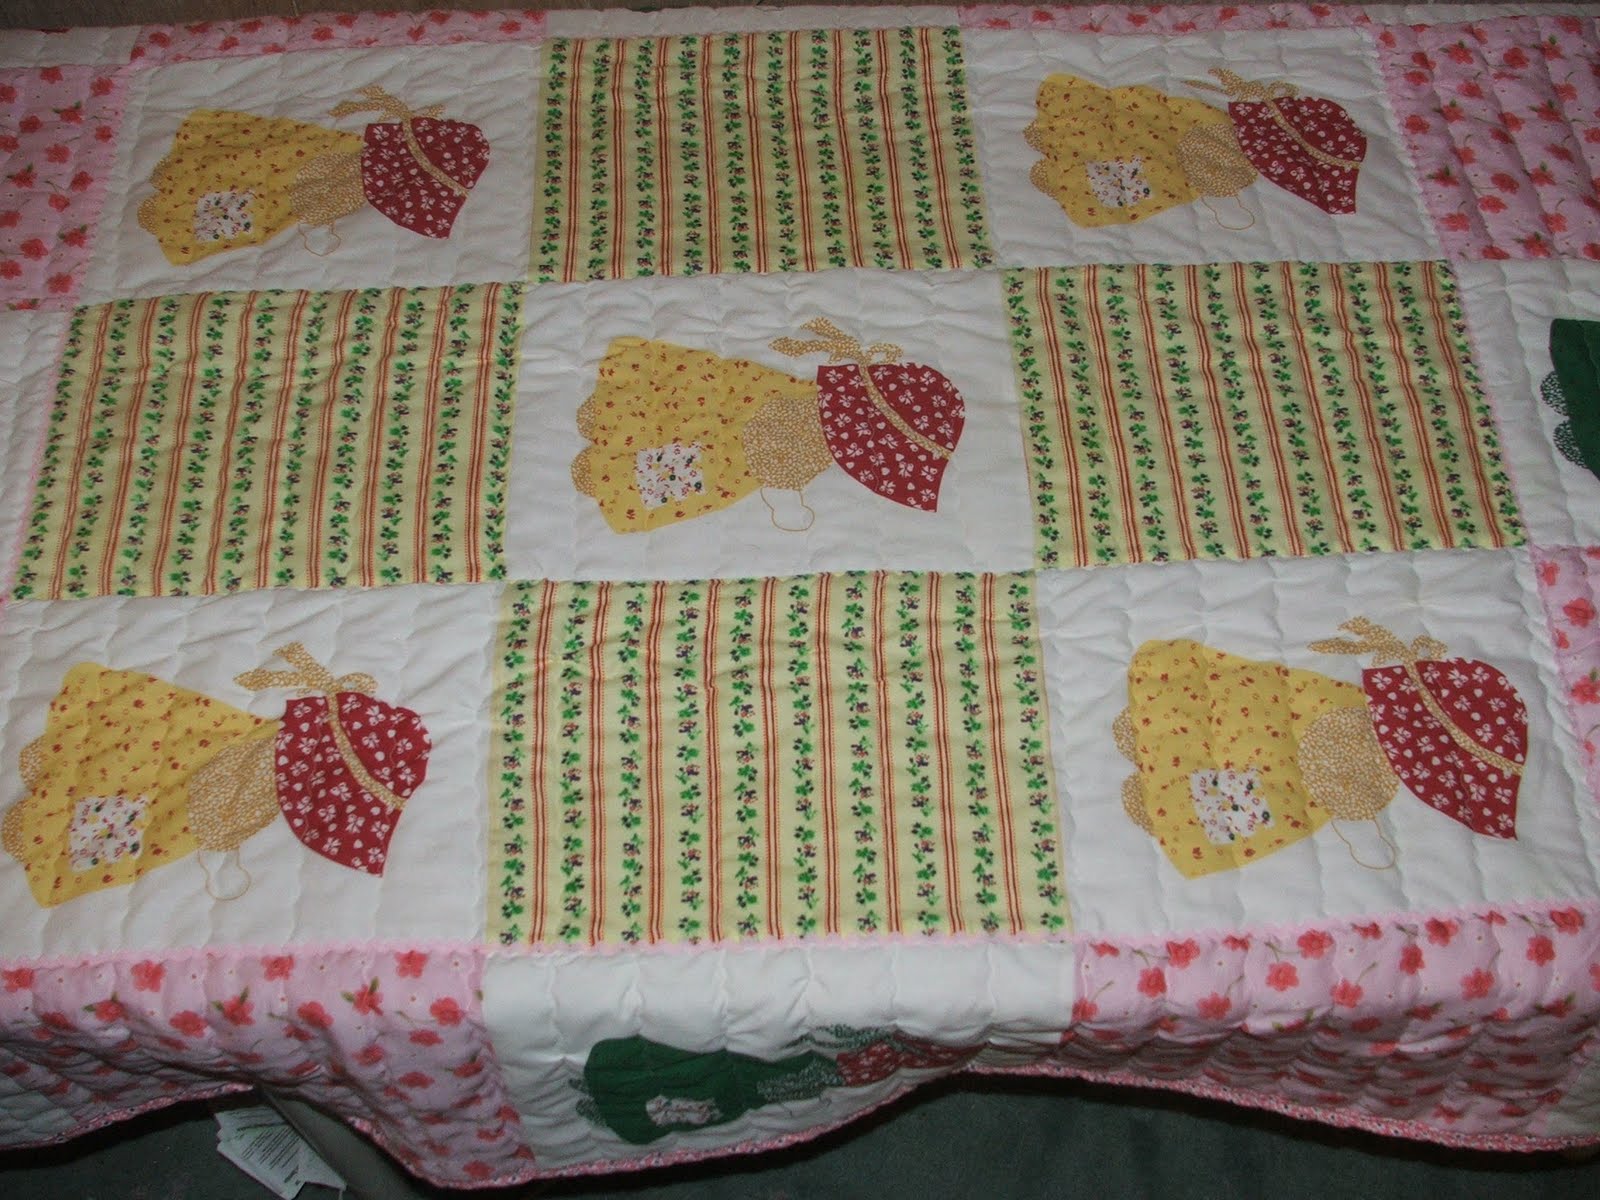
The Bonnet Sue squares are yellow, green and red on a white background. Two different squares. One has a green dress on Sue and one with a yellow dress on Sue, with Sue wearing a red bonnet on both of them.

I introduced the pink/red/green fabric mainly because my granddaughter's bedroom is pink, so the quilt will match her room.

The other fabric, the yellow/green/red is similar to the fabric I used on the backing of the other quilt that I made up for my granddaughter, which was the first one that I ever made up, the Strawberry Shortcake Quilt Set earlier this year.

Click the link below to see more on the other quilt I made, the first one, earlier this year.

I used the pink/red/green flowered print on the back of the Bonnet Sue quilt. In the photo below, the quilt's 3 layers are pinned together and folded up, awaiting to be quilted on my sewing machine tomorrow.

Still working on the quilt. Altogether, there's a total of 25 squares, the 11 X 14 inch size on the front of the quilt. It's present size is 52 X 70 inches square, with the back being just one giant square. I might be adding some rick rack or the like to the front of the quilt. Undecided at this point. Thinking of using it to seperate the different color schemes that I used on the quilt, like a color block or the like.
5 squares wide by 5 squares long = a total of 25 squares used on the front of the quilt. Only 4 across showing in the photo below. The unseen 5th row which is hanging off the table on the other side is the same as the first row which is hanging over the side of the table in this photo. If you go to the top of this post and look at the first photo, the photo shows the 5 squares going down the quilt.

Will be uploading more photos as I go along. Hope to have this quilt completed by midnight Saturday, if all goes well. I started making this quilt earlier this week, on Monday.
Monday - After deciding what fabrics to use with the ready made 11 X 14 inch Bonnet Sue fabric squares, cut out the 11 X 14 inch yellow & pink fabric squares.
Tuesday - Sewed the 25 squares together. In the evening went to Walmart's to pick up the batting for the quilt.
Wednesday - Cut up the 52 X 70 inch square backing. Pinned all 3 layers together, the front, the batting and the back. Had to trim the batting to size. Took the above photos. All of them, except for the Strawberry Shortcake quilt photo.
Thursday - Still working on this post, well after midnight. Still adding to it at 1:30 AM.
My two felines, Velvet & Sparky are behaving pretty well. That is, after I chases them away, several times, away from this sewing project. In the photo below, they're laying on the floor, side by side, like 2 well behaived cats...LOL.

Finally completed the quilt Saturday, around 11:30 PM, just before midnight. Here's more photos of it being made up and completed.... The cats were good. They didn't bug me at all, but my phone kept on ringing and I made the conversations short, saying that I was busy at my Brother SE350 sewing/embroidery machine working on the quilt.
For doing the quilting, used decorative stitch # 38, which looks like waves. You can see that in the photo below. Moved the needle to the center, which is the 3.5mm. Changed the stitch size to 2.5

Before running the rows of waves stitches horizontally, I ran rows of the wave stitches vertically where the fabric squares are joined together. These rows are about 9 or 10 inches from each other. Thus helped with holding the batting in place and preparing for doing the horrizontal rows of waves.

After that step was completed, did up my horizontal waves with spacing the rows 2 inches apart from each other. Did that by using a quilters guide that was inserted through a section of the foot that I was using, the "J" foot. This one didn't come with my machine. It's one that I had from another sewing machine. You can see it in use in the photo below. That's the thin metal gaget sticking out on the side of the machine. I had never used it before. I had to refer to my Brothers owners manual for inserting it into the foot. Was simple and easy to do.
First time for quilting this way and first time for using this gaget. When I did up the Strawberry Shortcake Quilt, the first machine quilt that I ever made, I used the fabric design on the back of the quilt for doing up straight lines of quilting. So, doing it this way, on my second quilt was a wee bit different.

Finally getting to the other end of the quilt with the rows of waves. Only about 3 more rows to go in the photo below.

That was a tight squeeze when rolling the quilt up to get to this point. You can see how I had rolled the quilt up in the photo below. It is loosely rolled up. Really need something to tighten up the rolls of fabric so they aren't as bulky when doing a quilt this size. I used hat pins on the Strawberry Shortcake quilt. This one is larger and bulkier. Right above it is the speed control. I kept on hitting that with my hand when guiding the material and having the speed change on me and had to move it back into position.

Now, all done with the quilting, the rows of waves that is. You can see how it looks in the photos below.
The front of the quilt.

The back of the quilt.

Next, I'm off to my fabric stash to look for some fabric to use for the edging.binding. Came across this fabric. It has a pink background with white flowers on it with a black dot in the center of it. I'm actually making this quilt up as I go along. No pattern and no instructions. Just using common sense...LOL.

Made up fabric strips 3 1/2 inches wide by the length of the fabric. This piece of fabric is a hare under 2 yards long. I then folded the fabric in half and pinned the strips lengthwise, with the right side of the fabric facing outwards. Then I laid it on the edge of the the quilt and sewed it to the quilt. Did that on the front of the quilt, the side with the 25 squares on it.

Next I turned the quilt over to the other side, the large pink square. I folded the fabric strip inwards and top stitched it.

Next, I trimmed the excess batting off of the edges. Did that to all 4 strips as I did them up. I also use this plastic container for the end threads that I cut off when sewing along. I also cut the corners off on the ends of the strips before folding them over, too.

It looked like this when that was done. Did this to all 4 sides of the quilt. Turned the ends under when going across the top and the bottom of the quilt. Just about done after doing all 4 sides this way...
P.S. Turned that gaget, the quilters guide, upwards because its not in use. You can see that sticking out near the upper part of the photo. Might just leave it on the machine and put it to use for doing other things up. That seems to be a handy gaget.

Overlapping the top binding strip after edges cut off. Really gives the quilt a squarred-off look.

The last step... Sewing the pink rick rack around the 9 center squares. I measured around them and figured out that I needed 140 inches of rick rack.
Found a light pink piece in my rick rack stash that was about 150 inches long. Put it to use and ended up with the ten inches of it left over. Below is a closeup shot of the pink rick rack.

Done, finish complete. Put the quilt back on the same table for taking more photos of it. It's overhanding on both sides. There's 5 quilt squares across/ horizontally and 5 quilt squares going up and downwards/vertically. Had to put the end leaf back on the table for the length of the quilt.. Below are photos of the completed quilt from different angles.

Should put it away and give it to my granddaughter for Christmas. She's only about 6 weeks old now plus she has the Strawberry Shortcake Quilt to use now, in the crib...

This quilt, the Sun Bonnet Sue Quilt, is for when the crib is converted over to the youth bed. They make them as 2 in 1's nowadays.

Used some of the photos from above when doing up the storyboard/collage of photos that's in the begging of this post. We'll might as well as end with it, too.


